
1. Create new project
In this chapter all the functions of Gamman will be explained in detail. A general working procedure for analysis of gamma spectra with Gamman is shown in the chart below.
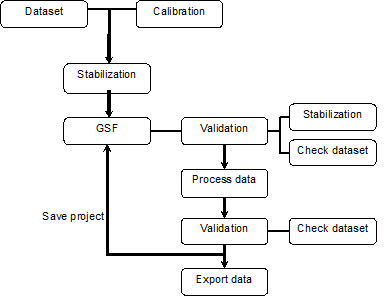
1. When creating a new project, Gamman will create a file called a Gamman Survey File (GSF). Gamman stabilizes the imported data (to make sure the energy peaks are at the right place) with information from the calibration file of your detector.
2. The second step is to validate the dataset and the stabilization. The dataset could contain incorrect data which you want to remove, this data can be tagged.
3. After choosing the fitting scheme the data can be processed to calculate the nuclide concentrations. Several fitting schemes can be applied to improve the accuracy.
4. Again the 'new' dataset can be validated and exported for further processing in for example a GIS tool. All settings and information is stored in the Gamman file.
Create a new project
When adding a dataset to Gamman the data will be energy stabilized with the factors in the calibration file of your detector. This new dataset forms the Gamman Survey File (GSF).
Import dataset
Importing data from a json file in Gamman is done with the help of the mDOS parser. Below is a short description of how this can be done. A more detailed description of the mDOS parser is available on the mDOS parser page on our documentation website.
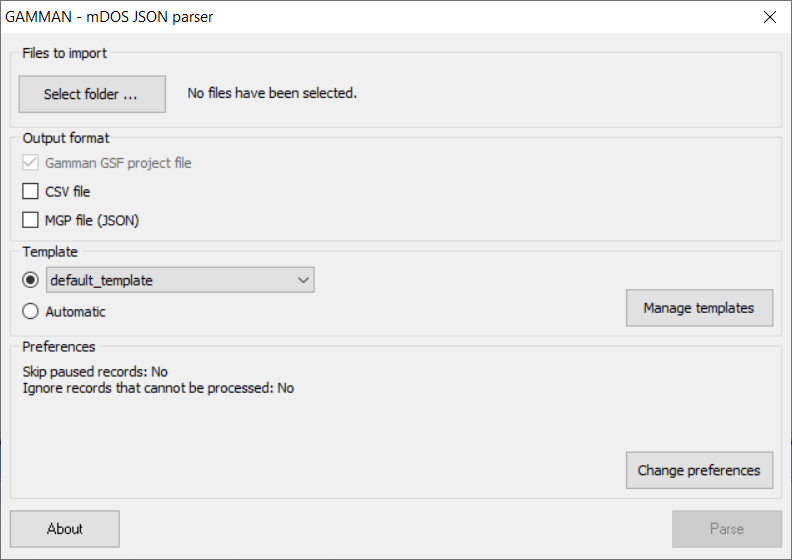
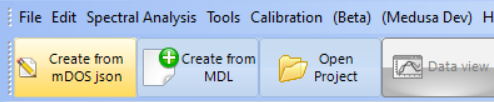
Go to the menu bar and click on the shortcut “Create from mDOS json”. The parser will then appear.
Select a folder that includes the json files that you want to import. The parser recognizes the json files in the folder and will import the data into Gamman in chronological order. Other file types that are present in the folder will be ignored.
Note that the json files in the folder should contain the same Medusa calibration file (MCF).Choose the output format. After importing, a Gamman Survey File (gsf) will be created. Additionally, you can choose to create a new csv or json file that contains the raw data just as the original json file, but altered as specified by the template used in the parser.
Choose a template. With a template you can specify the values present in the selected json files that you want to import. Select an existing template from the drop-down menu or create a new one by clicking on “Manage templates”. Then the template management screen appears:
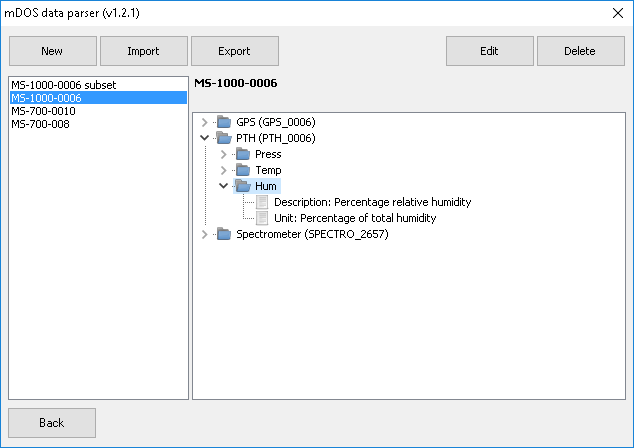
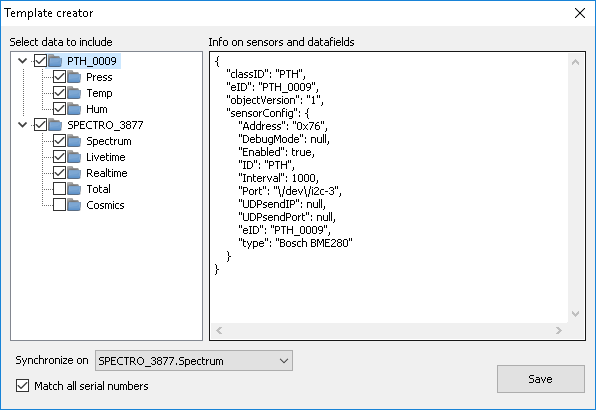
Here, templates can be created, imported, exported, edited and deleted. Create a new template by clicking “New” and select a json file that contains the column headers that you want to include in the template. Now, a new screen appears where the data columns can be chosen to include in or exclude from the template. The data here is divided into the different sensors used with the spectrometer. After selecting the desired data columns, choose a sensor to synchronize the data on. Click on “Save” to save the template. Then select the template on the previous screen (template management screen) and click “Back” to use the selected template.
Change preferences. Some settings can be changed here. You can choose to skip paused records, ignore records that cannot be processed, and change some csv export settings.
Click on “Parse” to import the data in the gsf file and create a new csv or json if those were selected.
Other file types than json files can be imported into Gamman. These include Medusa MDL and SDF files. When importing these files, the correct calibration file needs to be selected as well. After that, a screen will appear on which data from different sensors can be selected to import. When this is done, clicking on “Ok” imports the data into Gamman.
See also
· Reference > Import file type support