
5. Adding and modifying data
Along with gamma spectral information, other data can be imported in the GSF file. In this way data from other sensors (for example an altitude meter) can be integrated into one file. A time stamp is used to link the data to each other. If needed, your existing data can also be modified in several ways, for instance to apply some sort of correction to your dataset.
5.1 Modifying data
Modifying data can be a useful tool if erroneous data is present or if you want to apply some sort of correction. Data can be modified in the raw and processed dataset.
Modifying Data - Calculator
1. Select one or several records from the data viewer table, multiple records can be selected by holding the left mouse button down and dragging. Rows and columns can be selected, the
specified action will apply to all selected fields.
2. The calculator is accessible by right clicking on the fields selected. A drop down menu pops-up, select Calculator.
3. Existing data can be replaced (R) or a specified value can be added (+), subtracted (-), multiplied (*) or divided (/) from the existing value.
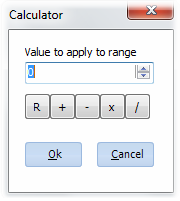
No changes to your dataset will be made unless you press Ok, simply press Cancel to abort, the initial values will be restored.
Statistics of a specific column (minimum, maximum, average and standard deviation) can be accessed by selecting View log in the menu bar. In "Full log" all the events of the gsf itself are shown and in "Info box" column information can be accessed. When the info box is open, double clicking on a column header of the data will reveal the minimum, maximum, average and standard deviation of the values in the column.
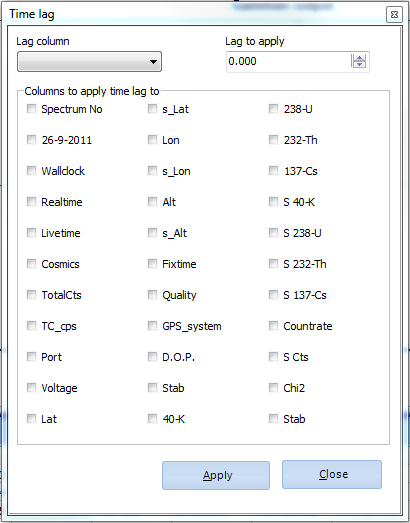
Insert time lag
If necessary, you can apply a time lag to your data. To do this, choose Insert time lag from the Edit menu. A pop up window will appear where you can choose the column in which your time lag is stored or what lag you want to apply. The columns on which the time lag can be applied, can be marked below. After entering your settings, press Apply.
5.2 Adding auxillary data
Adding auxillary data can be useful if you want to combine your existing gamma spectral data with other information. Gamman uses timestamps to connect the data. Missing or incomplete data can be interpolated or a fixed or last known value can be used.
Import auxillary data
1. Before starting the wizard make sure your file contains a row with the column headers, this will help identifying your data. The data should be ASCII file format, for example CSV or TXT. For best results it is important that the time stamp from your additional file corresponds with the time stamp from the GSF. For instance using timestamps logged with a GPS.
2. The wizard can be found in the File menu click File | Import Aux Data. A new window will show up, click "Next" to start importing your data.
3. The first step is to specify the path of the file. Next, define the row containing the titles from the additional data file (red) and the row at which the importation process should start (yellow).
Click "Next" to continue.
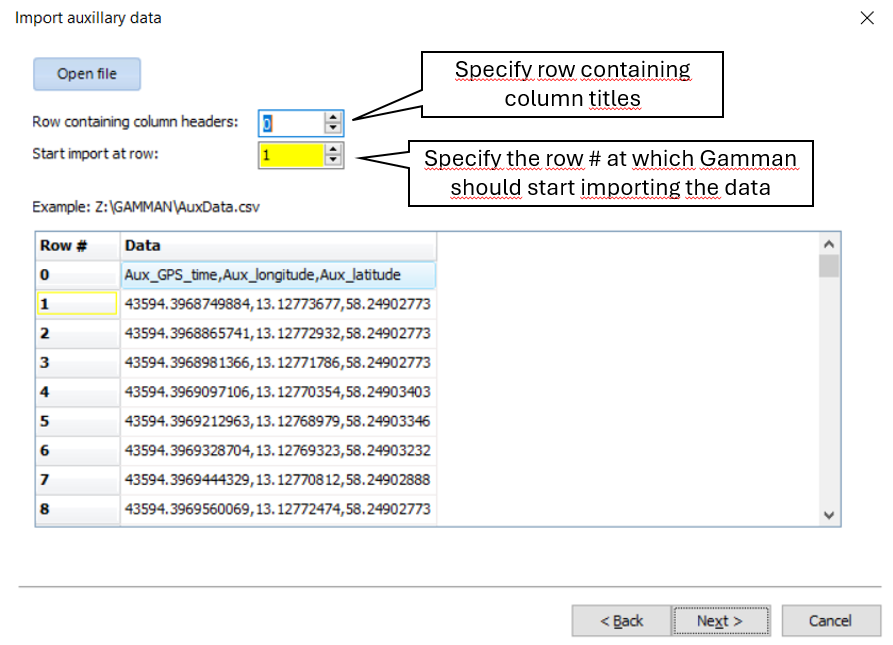
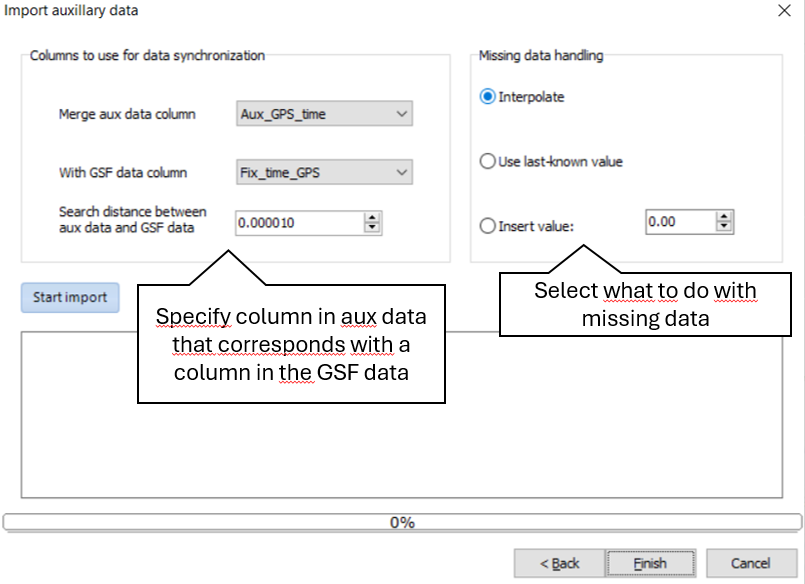
The images show the different windows that show up when importing auxillary data in Gamman
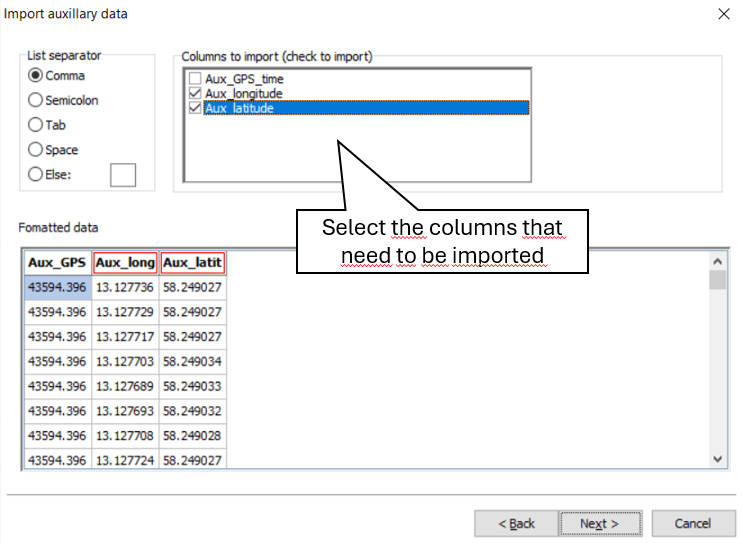
4. Next, a window will show up where you can specify the list separator used in the additional dataset. Check the column(s) from your dataset you wish to import from the list, the selected columns will be marked in the 'formatted data' textbox.
5. Finally set the linking column (timestamp or other) and choose which method you would like to use to replace any missing data. ´Interpolate´ will use a linear interpolation technique to calculate missing value and 'insert value' will use a fixed value as replacement. Click Start Import to complete the process.
The columns are now added to the raw data table.