
Connecting
Connecting to the Detector
This chapter covers everything you need to do before the measurement starts: mounting the detector, supplying power, and opening the mDOS interface in your browser.
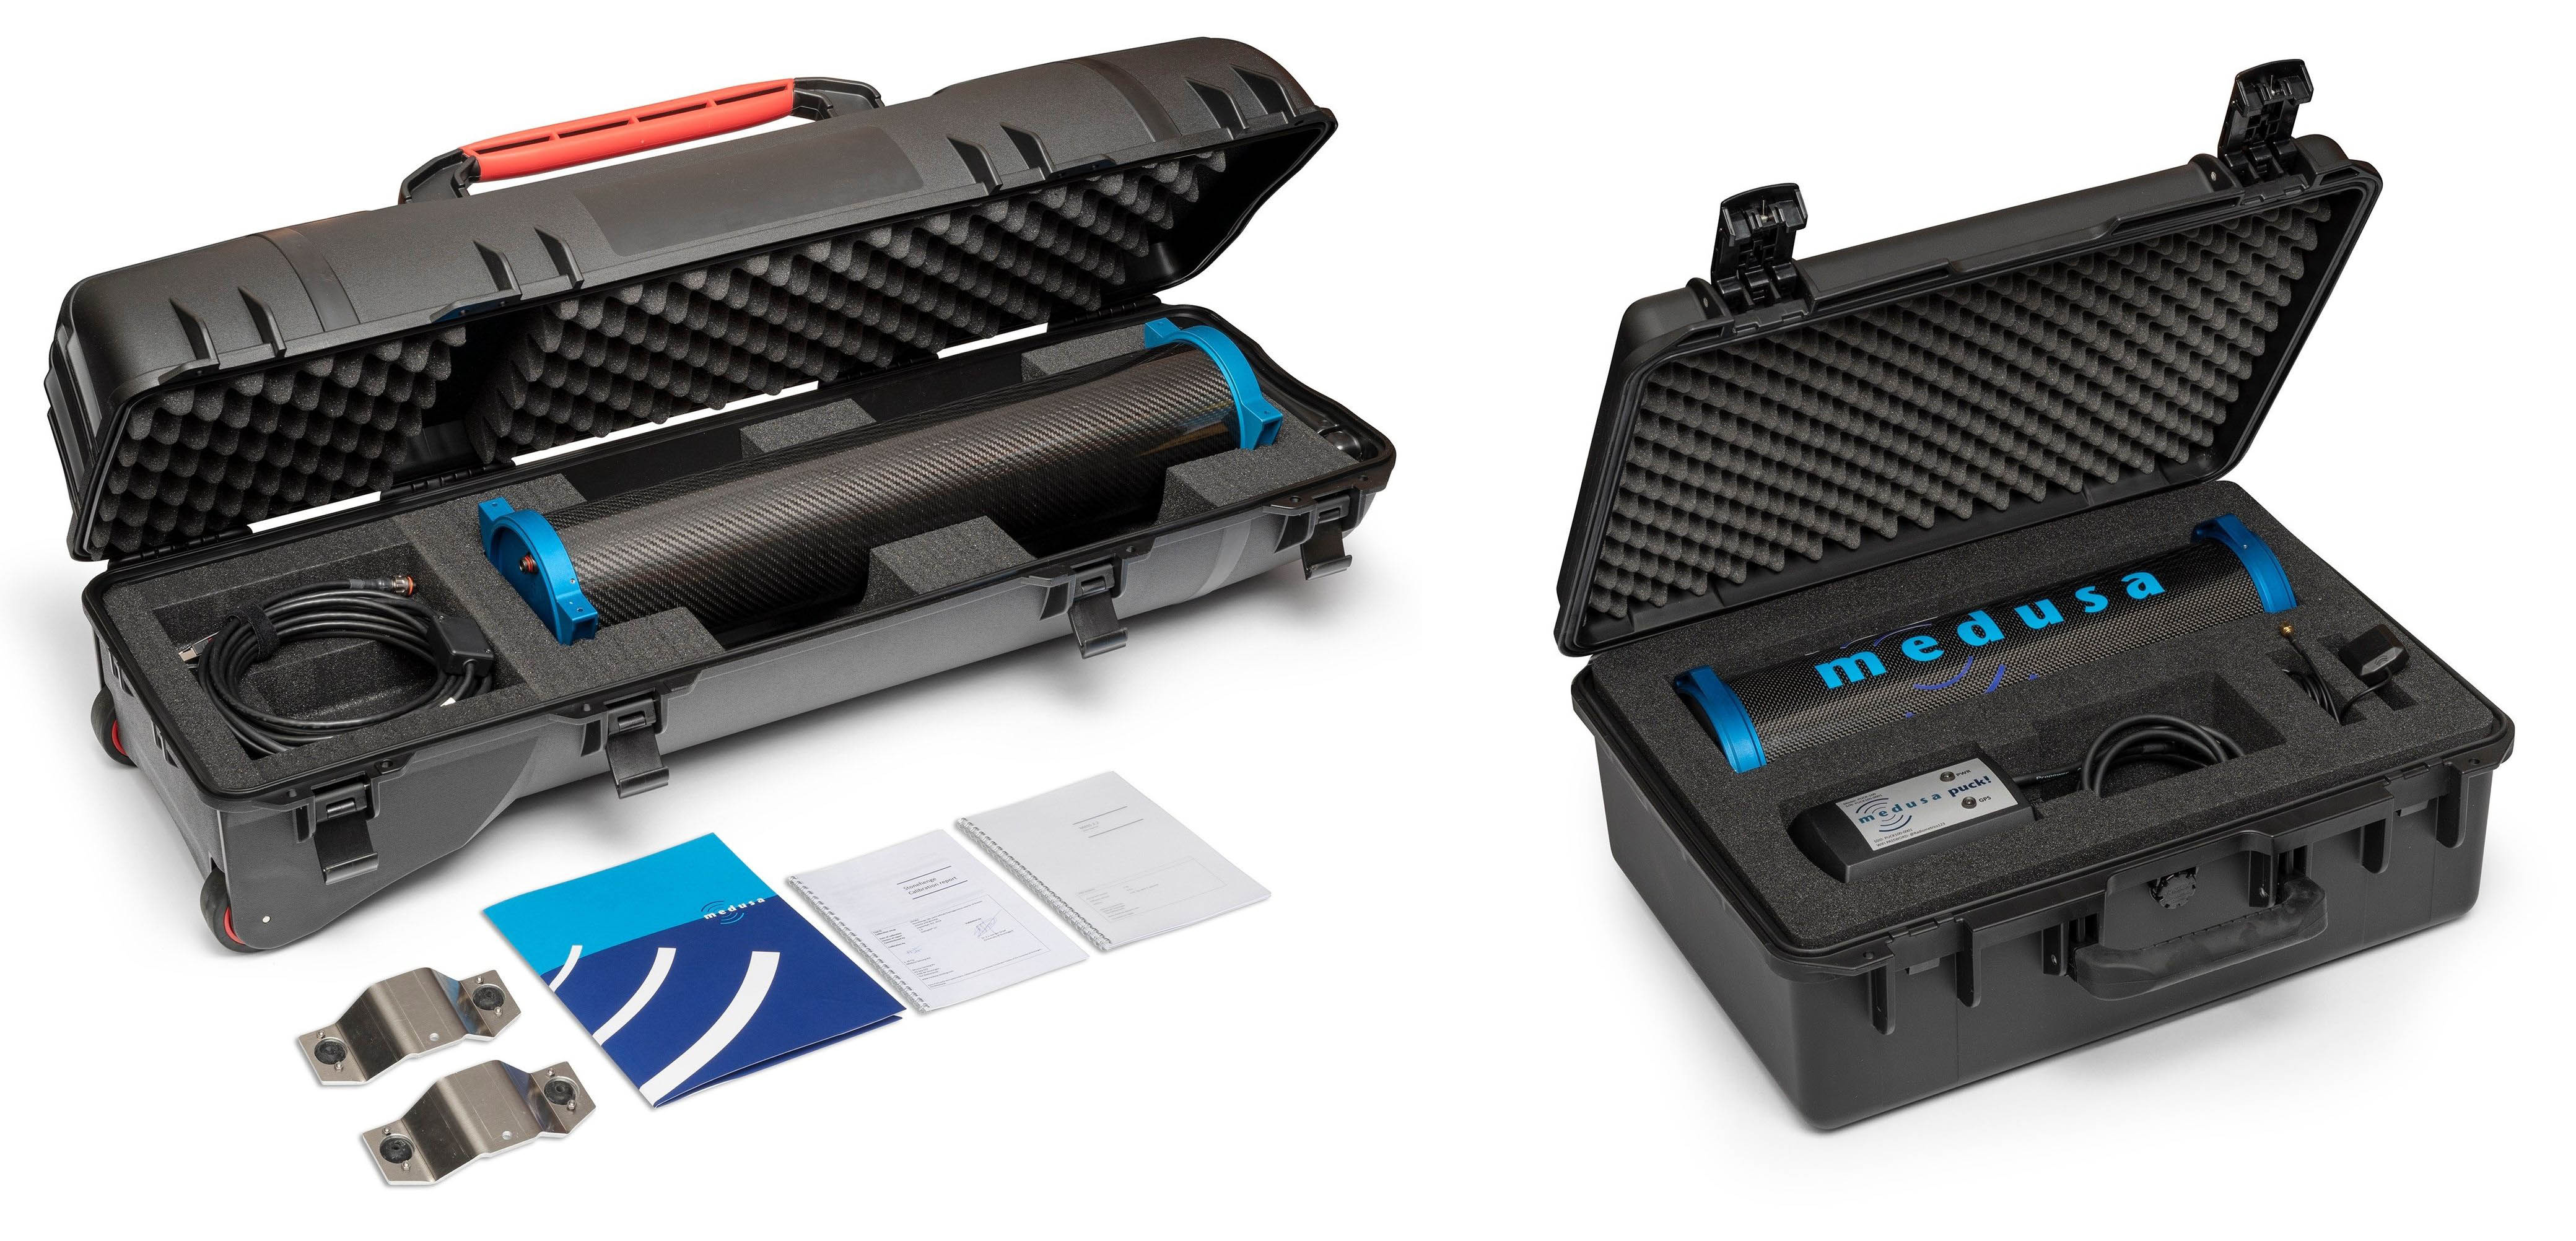
Mounting the Detector
This crystal and the device's electronics should always be handled with care — dropping, hitting, or significant impact can break the crystal. Medusa has optimised the weight of the spectrometer systems and implemented a shock-absorbing layer to keep the crystal stable, but improper use could damage the instrument.
Note: If you are in doubt about mounting, handling, or other issues, contact Medusa. Our support team is always happy to help.
The end caps of the detector have mounting points that can support its weight when properly fastened. Dimensions and mounting points differ between detector models — the MS-2000, for example, can be mounted using MSB-20x mounting brackets, while smaller systems typically use the MSB-30x mounting plates .
Gamma-ray detectors are sensitive to radiation from all directions, so there is no preferred orientation. Mount the detector so that as little material as possible sits between the sensor and the ground — every layer of material between the soil and the detector attenuates the gamma radiation you are trying to measure.
Warning — UAV use: Always confirm that your UAV platform can handle the detector's weight before flying. Test with a dummy weight first. Weak frame stiffness or magnetic interference (for example from GPS antenna magnets) can cause instability when flying at maximum load. Make proper preparations before attaching a Medusa spectrometer to a drone.
Powering the Detector
Medusa supplies cables specifically designed for each detector type. Always use Medusa-certified cables. Different cables allow different connections.
Detector | Cable | Input voltage range | Power connector |
|---|---|---|---|
MS-20k / MS-4000 / MS-2000 / MS-7300 | 9 – 35 V | Ethernet + flying leads | |
MS-1000 / MS-700 / MS-350 | 5 – 35 V | USB or flying leads |
The detector operates on voltages between 5 or 9 and 36 V. The internal electronics are protected against reverse polarity and over/under-voltage up to 60 V. During normal operation, the detector uses approximately 3 W, with peaks up to 6 W. Any power source you use should be able to supply at least 1.2 A at 5 V. A standard USB port on a computer is not sufficient.
Note: Some power banks reduce their output voltage after a few seconds when a cable is inserted but nothing is connected yet. If you are using a cable with a voltage booster (such as the MDC-506), connect the detector to the cable before inserting the cable into the power bank. Inserting the cable first and then waiting may result in the detector not starting.
Once power is connected, the detector starts automatically. No power button needs to be pressed. The PWR LED on the top cap lights up green when the input voltage is in the correct range.
Connecting via WiFi
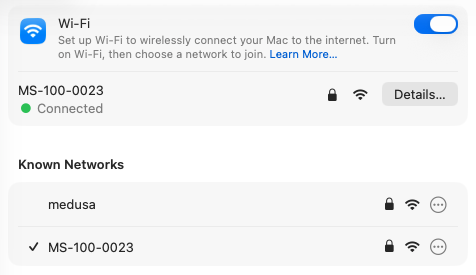
The detector broadcasts its own WiFi access point. This is the easiest way to connect from a phone, tablet, or laptop without any additional network equipment.
Setting | Value |
|---|---|
Network name (SSID) |
|
Password |
|
Web server address |
|
Connect your device to the detector's WiFi network the same way you would connect to any other WiFi network. Once connected, open a browser and navigate to 192.168.3.1.
Note: On phones and tablets, turn off your mobile data connection if you have trouble reaching the interface. The device may otherwise route traffic over the cellular network instead of the WiFi connection to the detector.
The detector's WiFi credentials can also be found in the interface under Settings → WiFi → Detector WiFi, where a QR code is available to connect quickly from a phone.
Connecting via Ethernet
The detector can also be reached over a wired Ethernet connection, either directly from a computer or through a router on your local network.
Connection type | IP address |
|---|---|
Direct connection to a computer |
|
Via a router | Assigned by the router (check router settings or use Detector Finder) |
When connecting the detector directly to a computer, set the computer's network adapter to a fixed IP address in the 192.168.2.x range (for example 192.168.2.100) with subnet mask 255.255.255.0. Then navigate to 192.168.2.150 in your browser.
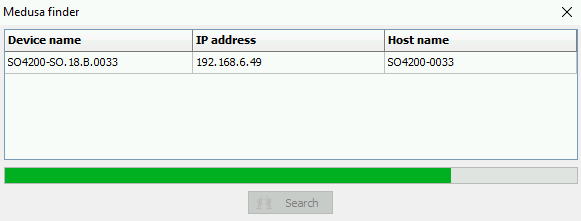
When connecting through a router, the router assigns an IP address automatically. Use the Detector Finder tool or the detector's hostname to locate it on the network (see below).
Finding the Detector on Your Network
If the detector is connected via a router and you do not know its IP address, you have three options:
Detector Finder tool — Download medusa_finder.zip from the Medusa website and run the tool. It scans your local network and lists all connected Medusa detectors with their IP address and hostname.
Hostname (mDNS) — On networks that support multicast DNS, the detector can be reached using its hostname directly in the browser. The hostname follows the format <Model>-<SerialNumber>.local, for example MS-2000-0054.local. This works on most home and office networks without any configuration.
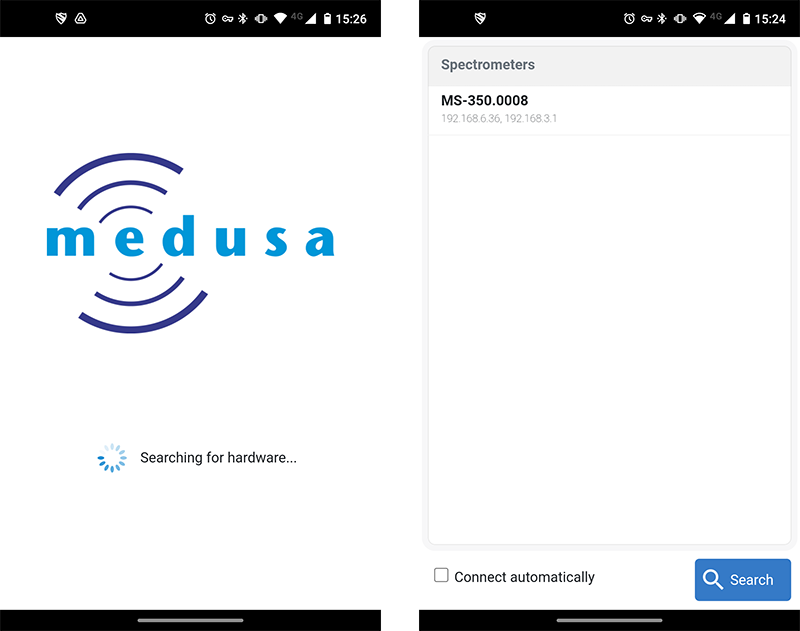
mDOS Android app — The mDOS app for Android (available in the Google Play Store) scans the network and lists connected detectors. The app does not connect to the internet, does not send any information to Medusa or anyone else, and stores nothing outside your device.
Opening the Interface in Your Browser
Navigate to the detector's IP address or hostname in any modern browser (Chrome, Firefox, Safari, or Edge). The mDOS interface loads directly — no login is required.
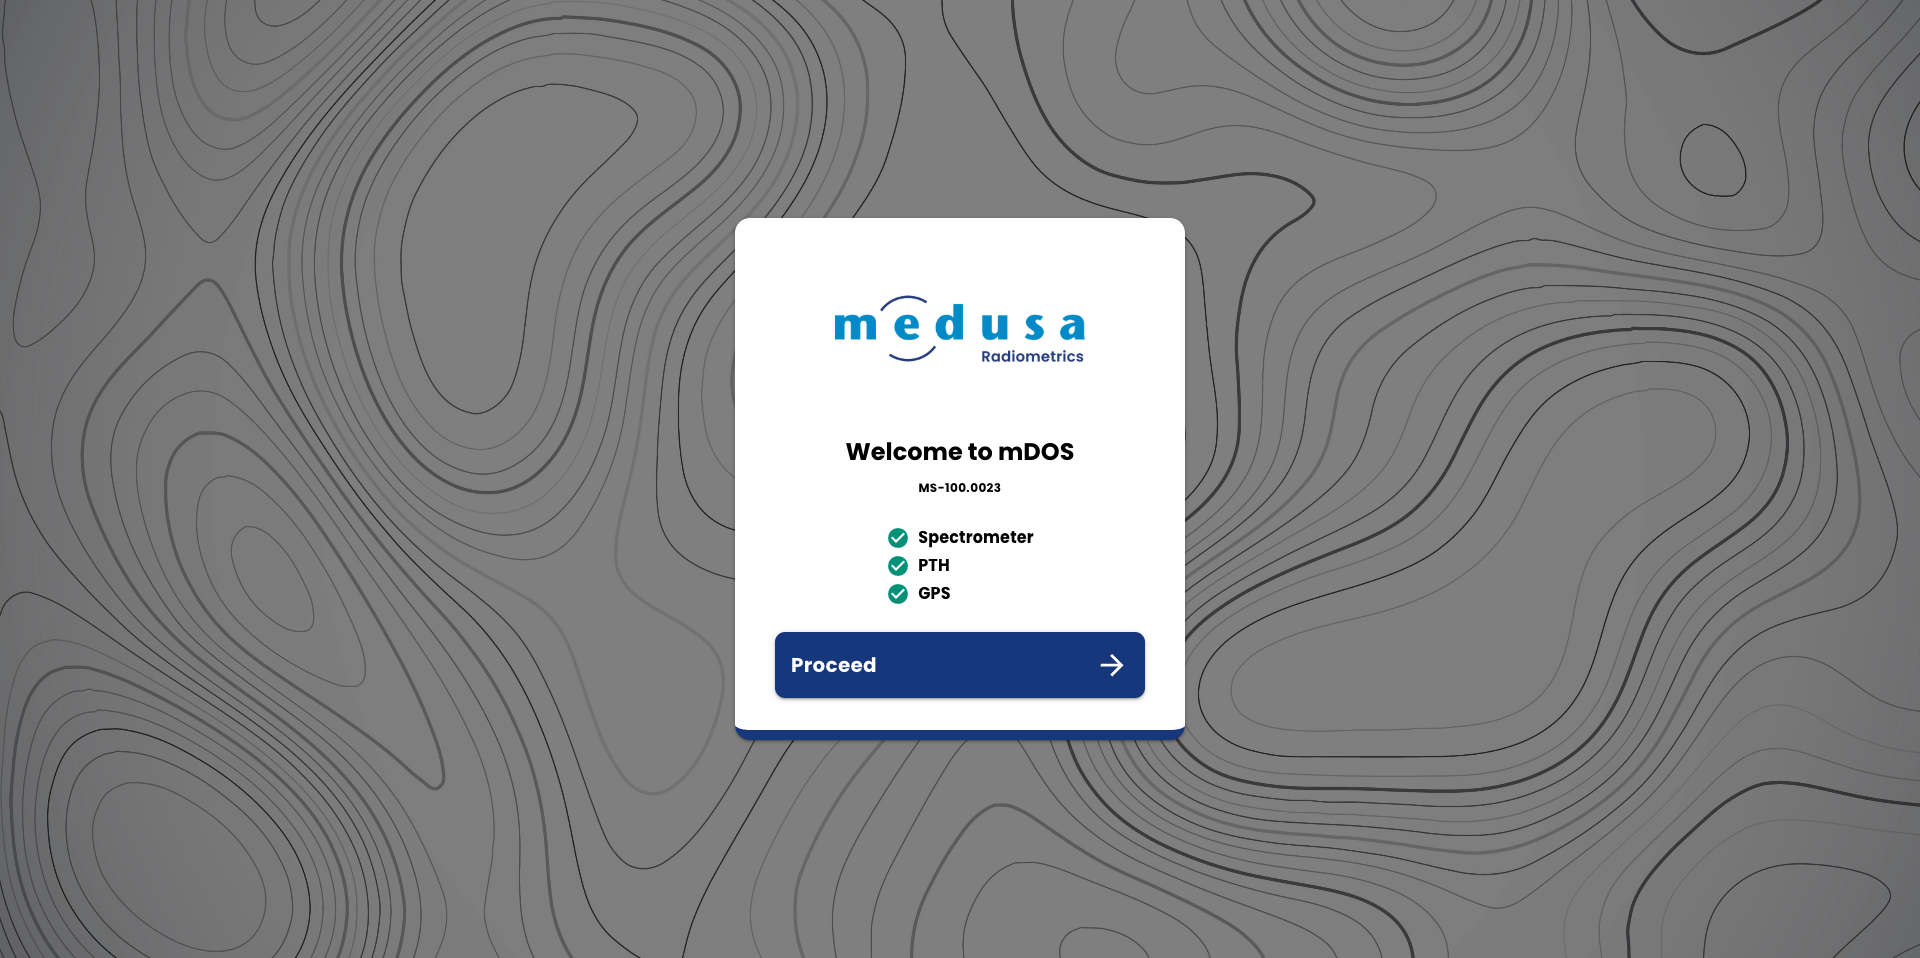
A welcome screen appears showing the detector model and serial number, along with the current status of the Spectrometer, PTH, and GPS sensors. Click Proceed to enter the interface.
After clicking Proceed, the Dashboard opens. From here you can check sensor status, manage projects, and navigate to all other pages using the sidebar.